Pomerium Desktop and CLI Clients
Pomerium is capable of creating secure connections to services like SSH, Redis, and more by creating a TCP tunnel to the service with a local client. This article describes configuring a route to accept TCP connections, and using either the CLI or GUI client to connect to it.
Create a TCP Route
-
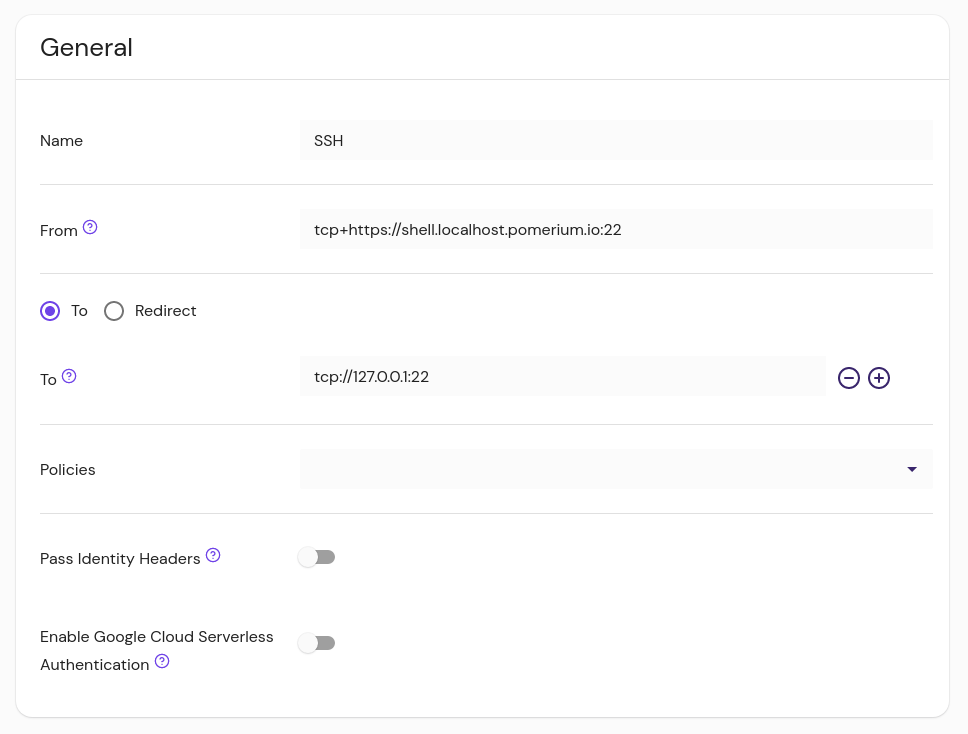
Specify this new Route as a TCP Route by prefixing
tcp+in the From field, along with a port suffix.The port is not used to connect to the Pomerium Proxy service from the internet; this will always be port 443 (unless otherwise defined in
config.yaml). Rather, the port defined in From is part of the mapping to the individual route. In this way, you can create multiple routes that share a DNS entry, differentiated by the port to determine which route they use.For example, suppose we have a server called
augurrunning behind Pomerium that has a MySQL server and also listens for SSH connections. We can create routes fortcp+https://augur.example.com:22andtcp+https://augur.example.com:3306. -
The To field uses
tcp://as a protocol, and specifies the address and port the service listens on.
The example below demonstrates a route to the SSH service on the host running the Pomerium Core or Pomerium Enterprise service:
- Pomerium Core
- Pomerium Enterprise
- from: tcp+https://ssh.localhost.pomerium.io:22
  to: tcp://127.0.0.1:22
  policy:
    - allow:
        or:
          - email:
              is: user@companydomain.com

See the "Configure Routes" section of TCP Support for more detailed information on TCP routes.
TCP Client Software
You can connect to this route with either the Pomerium CLI or Pomerium Desktop client.
- Pomerium Desktop
- Pomerium CLI
Install
Download the latest release from GitHub.
- Windows: The installer
.exefile will install and open the Desktop Client. Right click on the system tray icon to interact with it. - Linux: We provide Linux binaries as
.AppImagefiles, which can be executed in place or managed with a tool like AppImageLauncher. Interact with the client from the system tray icon. - macOS: Open the
dmgand move the binary to Applications. Interact with the client from the system tray icon.
Autostart Pomerium Desktop
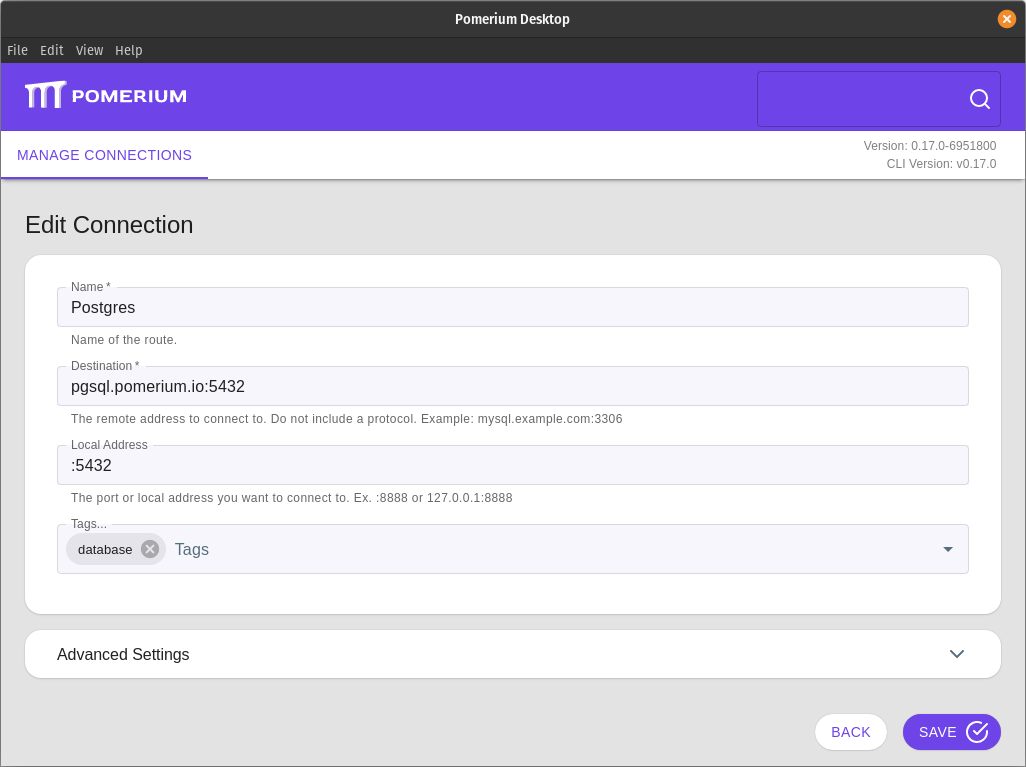
Add a Connection

Name: A local name for the route.
Destination: Matches the From value of the route, without the protocol. Always include the port specified in the route, and do not include the https:// protocol.
Local Address: The local address and port number from which to access the service locally. If left blank, the client will choose a random port to listen to on the loopback address.
In most cases, you only need to specify the port (ex: :2222), and the client will listen on all available local addresses.
Tags: Use tags to sort and organize your TCP routes.
Advanced Settings
Pomerium URL: The Pomerium Proxy service address. This is required if the Destination URL can't be resolved from DNS or a local hosts entry, or if the Proxy service uses a non-standard port.
Disable TLS Verification: Allows untrusted certificates from the Pomerium gateway
Client Certificate & Certificate Key File or Text: For routes that require client certificates for mTLS, you can provide the certificate and key file to the Pomerium Desktop client.
Install
See the Pomerium CLI page to learn how to install pomerium-cli in your environment.
Connect to a TCP Route
-
Invoke
pomerium-cliwith thetcpoption, and provide the route to your service (As defined infromin your Route specification).$ pomerium-cli tcp ssh.localhost.pomerium.io:22
2023/10/02 11:29:22 listening on 127.0.0.1:53656You can optionally supply an address and/or port to the
listenflag:$ pomerium-cli tcp ssh.localhost.pomerium.io:22 --listen :2222
2023/10/02 11:30:03 listening on [::]:2222 -
Connect to your service using the local address and port specified in the output of
pomerium-cli:ssh 127.0.0.1 -p 2222 -
When the connection starts, the cli will open your browser and direct you to your Identity Provider to authenticate your session. Once authenticated the connection will continue and you can close the browser window.
-
In this example, since we are using SSH we can consolidate the TCP and SSH connections into a single command:
ssh -o ProxyCommand='pomerium-cli tcp --listen - %h:%p' ssh.localhost.pomerium.io
For more examples and detailed usage information, see TCP Support
Advanced Configuration
If Pomerium is listening on a port other than 443 (set with the address key), the full TCP URL can be specified with a bastion host:
pomerium-cli tcp tcp+https://ssh.localhost:pomerium.io:8443/ssh.localhost.pomerium.io:2222 --listen :2222